I accidentally deleted important files on my Windows 11 PC and emptied the Recycle Bin before realizing I still needed them. These documents and photos are really important, and I’m trying to find the best way to recover deleted files after the Recycle Bin was emptied. I need help figuring out what recovery options still work in Windows 11.
First thing, don’t write more stuff to the drive if you care about the file. I’ve seen people delete something, then keep using the PC like normal, install tools, download random apps, run updates, and then wonder why recovery went bad. The file is often not erased on the spot. Windows usually removes the file record and marks the space as free. The data often sits there until newer data lands on top of it.
So yeah, time matters. Every new save, browser download, temp file, or update chips away at your odds.
SSDs make this worse. A lot of Windows 11 machines run on SSDs, and many of them use TRIM. Once TRIM does its thing, deleted data might be wiped in the background and recovery gets a lot harder, sometimes dead end hard. I’d move fast.
Stuff I’d check before touching recovery tools
- Recycle Bin
- OneDrive Recycle Bin, if your desktop or documents sync there
- File History backups
- Previous Versions on the folder where the file lived
- Any cloud backup tied to your PC
I know “permanently deleted” sounds final, but a weird number of files turn up in one of those places.
If none of that hits, then I’d go to recovery software.
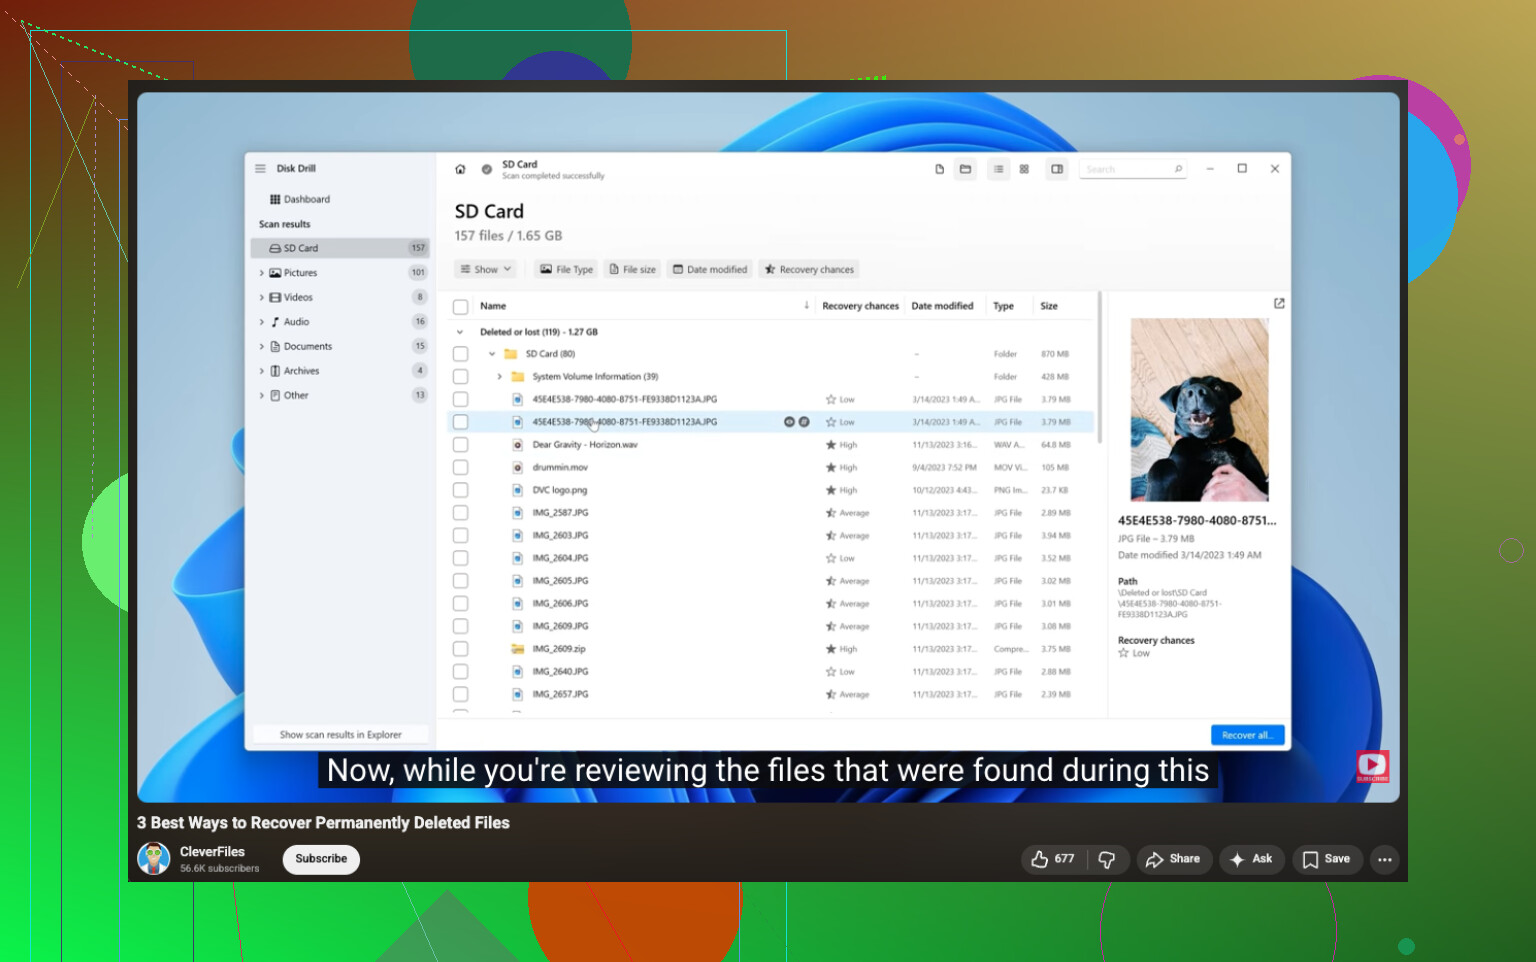
I’ve had solid results with Disk Drill. What I liked was simple. It scanned deleted files, handled formatted or damaged volumes decently, and when the file system info was still there, it kept original names and folders more often than I expected. One part I found useful was the option to make a byte-to-byte backup first, then scan the copy instead of poking the original drive. If you want to see what I mean, here’s the video URL:

The Windows free version gives unlimited scanning, file preview, and up to 100 MB of recovery. For me, that limit was enough to test whether the missing file was still recoverable before paying for anything.
If you want a free Microsoft option, there’s Windows File Recovery. It runs in Command Prompt. It works, but I wouldn’t hand it to someone who hates terminal stuff. No graphical interface, more fiddly, easier to mess up if you’re rushed or tired.
What I’d do, in order
- Stop using the drive as much as you can.
- Check Recycle Bin, OneDrive, File History, and any backups.
- If the file still isn’t there, run recovery software soon.
- Recover the file to a different drive, not the same one you’re scanning.
That last part matters more than people think. Saving recovered files back onto the same drive is one of those mistakes you make once.
If you move quickly, your odds are better. Wait too long, and the drive starts eating your chances.

21 Likes
If the Recycle Bin is empty, your best shot is to check Windows 11 restore points tied to backup features, then move to file recovery. I agree with @mikeappsreviewer on one thing, stop using the PC. I do disagree a bit on order though. For photos and docs, I’d check app-specific sources fast too. Office temp files, Adobe recent files, Photos app sync, even email attachments. People skip those and waste time.
For Windows 11 permanently deleted file recovery, this video walks through the steps in a clean way, watch this Windows 11 deleted file recovery guide.
If you need software, Disk Drill is one of the easier options on Windows 11. Preview first. Recover to another drive. Not your C: drive. If your PC uses an SSD, your odds drop fast because TRIM clears free blocks sooner than old HDDs did. If it was an HDD, odds are better. I’ve seen same-day recovery work fine, and one week later fail compleltey. Time matters a lot.
Empty Recycle Bin is not always the end, but I’d actually push one thing a bit harder than @mikeappsreviewer and @stellacadente did: figure out where the files were stored before you start trying every recovery trick in sight. If they were in Documents/Desktop/Pictures and OneDrive backup was on, recovery might be stupidly easy. If they were on an external HDD, that’s a diff story. If they were on your internal SSD, TRIM can make this go south fast.
A few places people forget:
- Word/Excel recent files and AutoRecover folders
- Photoshop/Lightroom catalogs or exports
- WhatsApp/Telegram/Desktop app downloads
- USB drives or SD cards where the files originally came from
- Shared folders on another PC on the same network
If you do need actual recovery software, Disk Drill is probly the easiest for most normal humans. Preview what it finds first, then restore to another drive, not C:. That part matters.
Also, Microsoft’s Windows File Recovery is fine, but honestly kinda miserable if you just want photos/docs back fast.
If you want a solid walkthrough on how to recover deleted files from a hard drive on Windows, that thread is worth reading too.
One more thing people miss: if the files were opened recently, search Windows using part of the filename or extension, because sometimes you deleted a shortcut, export copy, or moved version, not the actual file. Sounds dumb, happens allll the time.
One small disagreement with @stellacadente and @reveurdenuit: I would not spend too long digging through app temp folders before checking whether Windows itself has an older copy of the folder metadata. On Windows 11, File History, Previous Versions, and even some synced cloud version history can restore cleaner copies than temp-file hunting.
What I’d add:
-
Check hidden backup paths
C:\Users\YourName\AppData\Local\Microsoft\Office\UnsavedFilesC:\Users\YourName\AppData\Roaming- camera/photo app import folders
- browser download history if the files were downloaded originally
-
Look for version history, not just backups
If the file lived in OneDrive, SharePoint, Dropbox, or Google Drive desktop sync, the file may be recoverable from version history or cloud trash even after local deletion. -
If it was on an SSD, shut down sooner rather than later
@mikeappsreviewer was right about stopping usage, but I’d go further. If the files are truly critical, stop booting from that drive and scan it from another PC or a USB environment. -
Use recovery software only after narrowing the target location
Scanning the whole disk is slower and messier. If you know the original folder or file type, target that first.
About Disk Drill:
- Pros: easy UI, previews well, good for photos/docs, can find lost partitions, beginner-friendly.
- Cons: free recovery on Windows is limited, deep scans can return lots of junk filenames, and on TRIM-enabled SSDs it cannot perform miracles.
So my order would be: cloud/version history, Previous Versions/File History, app-specific autosaves, then Disk Drill or another recovery tool, recovering to a different drive only. If it was an HDD, odds are decent. If it was an SSD and some time has passed, odds drop fast.