I accidentally deleted a large batch of important work and family files from my Windows PC and the recycle bin is already emptied. I’m trying to decide between Disk Drill and Recuva for recovering as much as possible. Which tool works better in real situations for deep scans, reliability, and safely recovering photos, documents, and videos without making things worse?
Alright, here is my long-winded brain dump on Disk Drill, rewritten from scratch, because I keep seeing people ask about it and I went through a bunch of other tools before landing on this one.
I shoot photo and video as a side gig. Not a giant production house, just me, two cameras, a drone, a bunch of SD cards, a couple external SSDs, a desktop at home, a laptop in the bag. I move files around a lot. That means every few months something goes sideways.
Card yanked out too fast.
Drive dropped from the desk.
Windows deciding a drive “needs to be formatted”.
The usual chaos.
Over the years I tried a pile of recovery apps. Some free, some paid, one pirate copy I regret installing because it wrote to the broken drive and trashed half of what was left. I was still hopping between tools until someone sent me this thread on Reddit and told me to stop experimenting and stick with Disk Drill:
https://www.reddit.com/r/DataRecoveryHelp/comments/1qi1apk/disk_drill_review/
So I did. Been using it a lot since then, on real jobs, with real consequences if things fail.
How it feels to use in a panic
The first thing that hit me was how little setup it needs.
Every other app I used before tried to make me pick “quick vs deep scan”, weird modes, custom block sizes, different file systems, and if you guess wrong, you either miss files or burn an hour for nothing.
With Disk Drill I pick the drive, press scan, and let it go. It throws its own stack of methods at the problem behind the scenes. I see results show up as it works, no need to babysit it.
I’ve handed it to people who struggle sending attachments in email. They still managed to get their stuff back without calling me eight times. That says a lot.
Rough numbers on speed
I never timed with a stopwatch, but after enough panicked evenings you start to get a feel for it.
Here is roughly what I saw on my own stuff:
32 GB SD card, full of RAW + JPG
About 2–4 minutes over a USB 3 reader.
500 GB external SSD over USB 3
Somewhere around 15–25 minutes depending on how full it was and how much was damaged.
1 TB internal NVMe SSD
Longer, but I could already preview and restore key files before the scan hit 100 percent. I usually grab what I need, then let it finish if I care about the rest.
Other apps I tried forced me to wait for the full pass before showing any results, which is brutal when a client is texting every 10 minutes asking “are the photos safe.” Disk Drill starts listing files almost right away. You can restore mid-scan if you have to walk out the door.
File formats it handled for me
Every tool out there claims to “support hundreds of formats”. The difference shows up when you throw camera RAWs at them.
Stuff Disk Drill has successfully pulled back for me or friends:
Canon: CR2, CR3
Sony: ARW
Nikon: NEF
Olympus: ORF
Panasonic: RW2
Fuji: RAF
DNG from random gear and apps
Other apps either:
showed them as generic binary files
restored them but Lightroom refused to open them
or the previews were obviously broken
With Disk Drill, the recovered RAWs matched the original exports I still had backed up in a few lucky cases. Side by side, no weird artifacts, no extra noise.
Beyond stills, I have seen it bring back:
MP4 and MOV from mirrorless bodies
GoPro and DJI footage
Project files like .prproj (Premiere), .aep (After Effects), .psd, .ai
Office docs
Zips, RARs
Odd stuff like Apple ProRes, R3D, and a colleague’s .ma files from Maya
I do not use everything on that list personally, but when a tool understands niche formats, it usually means the devs spent more time on the engine and less on marketing fluff.
The wedding that almost went nuclear
One night around 11 PM I got a call from a friend who shoots weddings full time.
Two 64 GB cards from a full-day wedding. Ceremony, reception, portraits, everything. She stuck the first card into a USB reader, her Windows box locked up during copy, and after a reboot, the card was “RAW” in Disk Management. No volume, no folders, no photos. Just a blunt “you need to format this drive.”
She was half hysterical, I grabbed my laptop and drove over.
I installed Disk Drill on my machine, plugged her card into my own reader, told the app to scan the physical card. Full scan finished in around 4 minutes. It listed more than 800 RAW files and about 400 JPEGs. All with previews.
We spot checked random shots from throughout the day. First look, ceremony, family groups, first dance. All good. No corrupt frames, no weird color issues.
Restoring everything took a few more minutes onto a separate external SSD. Next morning she imported into Lightroom like nothing had happened.
I have seen people talk about “trust” in software. For me, that night was the pivot. If it saved me there, I was going to keep it around.
Why the preview matters more than you think
Most recovery runs end with an ocean of files you did not know you had.
Old browser cache bits. Thumbnails. Half-overwritten docs. Carved video segments that are useless. Without a preview, you are guessing which ones are alive.
Disk Drill shows thumbnails and inline previews for images, video, and documents right in the result list. You click, it opens a viewer, you confirm the file is whole, then you decide to restore or ignore.
On top of that, each file has a “recovery chance” tag: high, average, or low. It is not magic, but it tracks with what I see. High almost always works, average is hit or miss, low I ignore unless there is no alternative.
That info helped a lot when dealing with big batches. I did not waste time pulling thousands of low chance trash files off a near-dead drive.
What it did for camera and drone video
If you film on GoPro, DJI drones, Insta360, or similar gear, you probably had this problem at least once:
Recovery app finds a bunch of MP4/MOV/MKV fragments, you restore them, VLC opens, plays 2 seconds of footage, then freezes or crashes.
From what I understand, the reason is simple. These devices do not always write one big clean file. They split stuff, write in clusters, interleave metadata. Once the file system is gone, a basic scanner grabs whatever H.264/265-looking chunks it finds and glues them in junk order.
Disk Drill has something they call Advanced Camera Recovery. I am not going to over-sell it, I will just tell you what happened to me.
I had a 128 GB SD card from a DJI drone that got corrupted after a battery swap. Card went unreadable. Windows prompted to format, Mac said “uninitialized.” Classic.
Other tools:
Found some MP4s. Restored 12 files. Only 2 fully played. The rest froze mid-flight, some would not open at all.
Disk Drill ACR mode:
I pointed it at the same raw card. It took a bit longer than a simple scan, but when it finished, every video it listed played start to finish. No stutters, no weird length issues.
Same hardware. Same card reader. Same USB port. The difference only came from how the software handled the way DJI writes its data.
On their site and in the app they mention supporting GoPro, DJI, Canon, Sony, Nikon, Insta360, Panasonic, etc. I obviously did not test them all, but after the DJI case, I trust it enough to reach for Disk Drill first when someone brings me an action cam card.
How I deal with a drive that is starting to die
Separate story.
I had a 2 TB spinning external drive that started making occasional clicking sounds. Not continuous death rattle, more like one or two ticks during read. Event logs showed some read errors. That is the phase where people keep trying their luck and burn the drive to the ground.
Every read on a failing drive increases the chance it will go offline for good. So hammering it with random scans is the wrong move.
Disk Drill has a byte to byte backup feature that clones a drive or partition into a disk image file. It is not a file level copy, more like sector level, as-is.
Here is how I used it:
- Hooked up the failing drive and nothing else.
- Opened Disk Drill, picked byte to byte backup, targeted the entire disk.
- Let it run. It showed a visual map of the surface, with good sectors, slow sectors, and unreadable areas.
- It skipped really bad blocks on the first pass to grab the healthy data fast. Later it tried to re-read the problematic parts with smaller block sizes.
I paused once when the drive got hot, resumed after it cooled. Eventually ended with one big image file on a safe SSD. The map showed some red zones, but most of the surface was green.
After that, I unplugged the dying drive and put it aside. All further scans were run on the disk image like it was a physical drive. Zero risk to the original.
End result: out of 2 TB, I got around 1.8 TB back in working state. The external drive itself stopped spinning a couple weeks later. Without that clone, I would have lost a decade of old projects and backups.
The health monitor I ignored until it stopped me losing more stuff
Disk Drill reads S.M.A.R.T. data from drives. So you see things like:
Reallocated sector count
Pending sectors
Power on hours
Read error rate
Temperature
It is not as deep as dedicated tools, but it is in the same window I already use for recovery. That turned out to be enough.
Twice I opened it for something else, glanced at the S.M.A.R.T. panel, saw yellow warnings for reallocated sectors creeping up. Both times I moved data off to a new drive within a day.
Both of those drives started throwing severe errors later. One of them dropped out of Windows during a copy. I did not lose anything because I caught it early.
People underestimate how much cheaper it is to replace a drive early than to recover from one that has already failed. Having both monitoring and recovery in one app pushed me into better habits.
The “deleted but not destroyed” helper
There is a feature called Recovery Vault. The name sounds dramatic, the behavior is not.
You flip it on for drives or folders you care about. From then on Disk Drill quietly stores extra metadata about deleted files from those paths. It does not store full copies of the files or eat tons of storage. It keeps enough info to make later recovery more precise.
Example:
I have it enabled on my main project folder and Desktop.
If I delete something by accident while cleaning up, Recovery Vault knows the original name, path, and some structure details. Next time I scan, Disk Drill can:
Find it faster
Restore it to the original path
Show a higher recovery chance in a lot of cases
Set it once, forget it. It does not scream for attention. Months later, when you screw up and empty Recycle Bin out of habit, you remember it is there and feel slightly less stupid.
Using it on both Windows and Mac without thinking about it
My desk machine runs Windows. My laptop is a MacBook. I bounce drives between them all the time.
Disk Drill’s license gave me both versions. UI is close enough between platforms that I do not need to relearn anything.
The unexpectedly useful trick: scan sessions are portable. I can start scanning a drive on Windows, save the session, move the image or drive, open the same session in Disk Drill on Mac, and continue from that point.
Example:
I started a long scan on a 4 TB external at home. Needed to go to a gig. Saved the session, stopped the scan, ejected the drive, took both drive and MacBook with me, opened Disk Drill on Mac, loaded the session file, and picked up where I left off. No rescan from scratch.
I have not seen that in the other tools I used before.
Weird file systems it bailed me out on
Average users usually deal with NTFS, exFAT, and maybe APFS. My work setup, plus random stuff from other people, throws more variety at me.
Disk Drill has handled for me:
NTFS
FAT32
exFAT
HFS and HFS+
APFS
EXT2/3/4
BTRFS
ReFS
And raw devices that show up as “unallocated” or “RAW” in Disk Management
One small story.
Coworker handed me a USB stick from a Linux box with some configs he needed. It did not mount in Windows. Disk Management saw a partition, but nothing with a letter.
I opened Disk Drill, it recognized EXT4, did a scan, showed the folder tree as if I were on Linux. I grabbed the needed files, zipped them, sent them back. No Linux boot, no WSL, no ext drivers.
It saved me from having to set up a temporary VM for a five minute job.
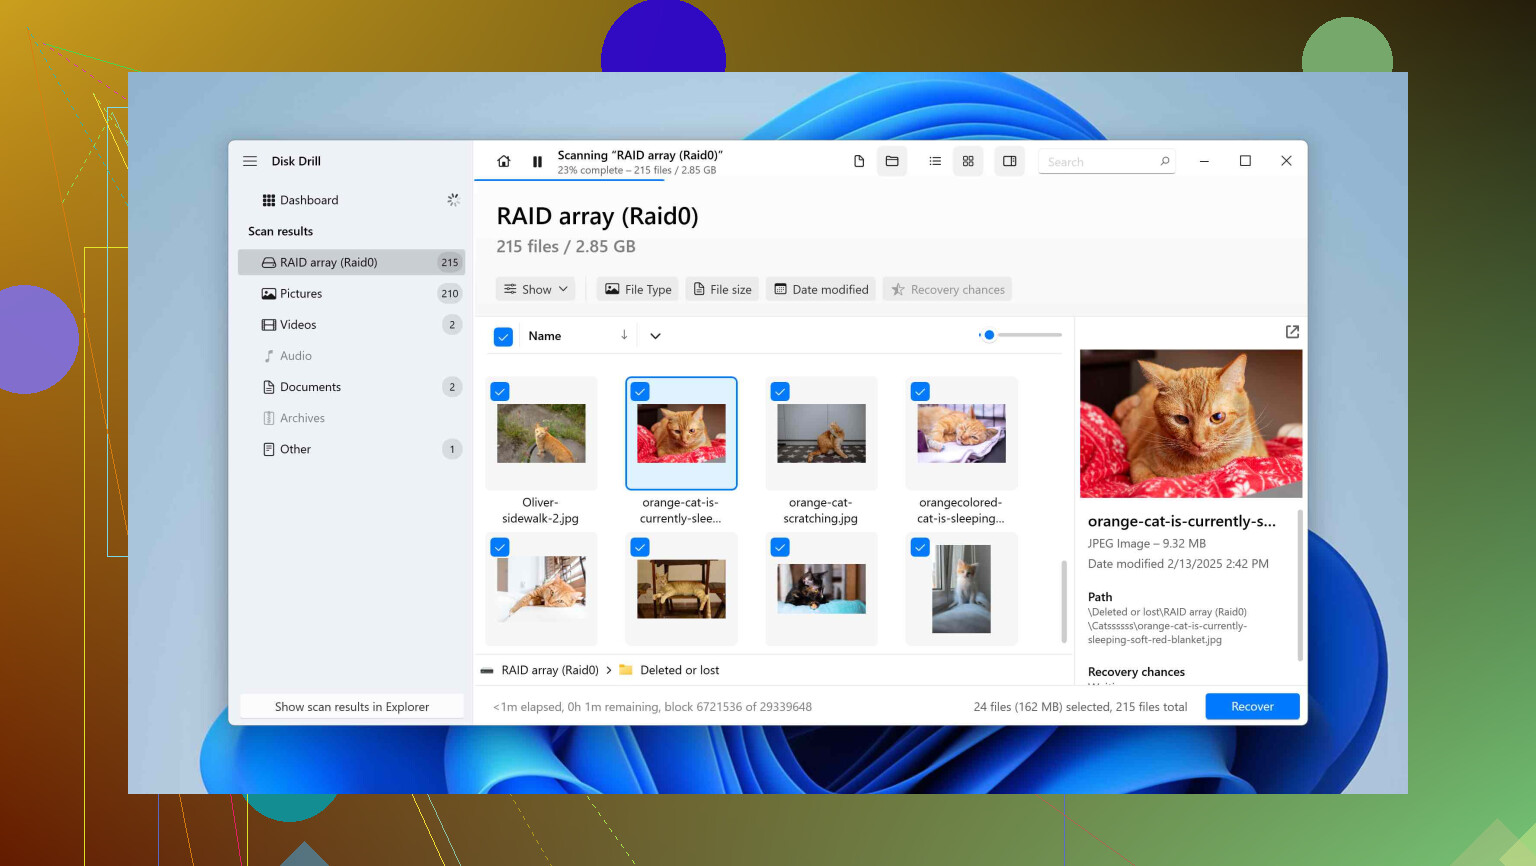
RAID and Storage Spaces
I do not run any complicated RAID arrays at home, but one person at a coworking space did. Their Windows machine had a Storage Spaces pool go sideways. Another guy had a software RAID 5 for media.
Disk Drill lists support for:
RAID 0, 1, 5, 6, 10, 1E
JBOD
Windows Storage Spaces
From what I saw on their machines, it can auto-detect the composition from individual disks and assemble the virtual volume for scanning. I did not operate it myself there, but I watched it reconstruct the view and pull a bunch of files before they went on to pay a pro recovery lab.
If your livelihood depends on a RAID box, I would not rely only on consumer tools. But for home or small office arrays that got messed up by a Windows update or controller hiccup, this at least gives you a shot without buying separate RAID-specific software.
Where it succeeded for me
Over the last couple of years, Disk Drill successfully recovered for me:
Photos and video from corrupted SD cards
Folders from a nearly dead 2 TB spinning drive
Footage from a formatted GoPro card
Work documents from an accidentally quick formatted USB stick
Data from a misconfigured NAS volume after a firmware glitch
Files from a Linux-formatted USB on a Windows PC
A full wedding coverage on a card that appeared as RAW
In all of those, three things stayed consistent:
The interface did not get in my way.
I could preview files before committing time and storage.
When it said “high” chance, the odds were honestly high.
That does not mean it will resurrect every drive or card. Sometimes the controller is toast or data is already overwritten. No software fixes that. But in every case where there was realistically something to pull, this app got me more of it, and with less drama, than the others I tried.
What I tell people who ask “should I buy it”
Here is how I usually tell people to test it.
- Do not write anything new to the damaged drive or card.
- Install Disk Drill on a different drive than the broken one.
- Run a scan on the problem drive.
- Look at what it finds and preview the important stuff.
- If the free version shows the files you need in working previews, then you know what you are paying for.
No need to trust a random stranger on the internet. Let the preview window answer the question for you.
That is about it. This is not some theory piece. This is years of messing up storage and trying different tools until one of them stopped letting me down at awkward times.
23 Likes
Short version. Use Disk Drill first, keep Recuva as a backup option.
Here is the practical breakdown for your situation.
-
Stop using the drive
Every write to that Windows drive risks overwriting the deleted files.
No installs, no big downloads, no defrags. If possible, install recovery software on a different drive. -
Disk Drill vs Recuva for your case
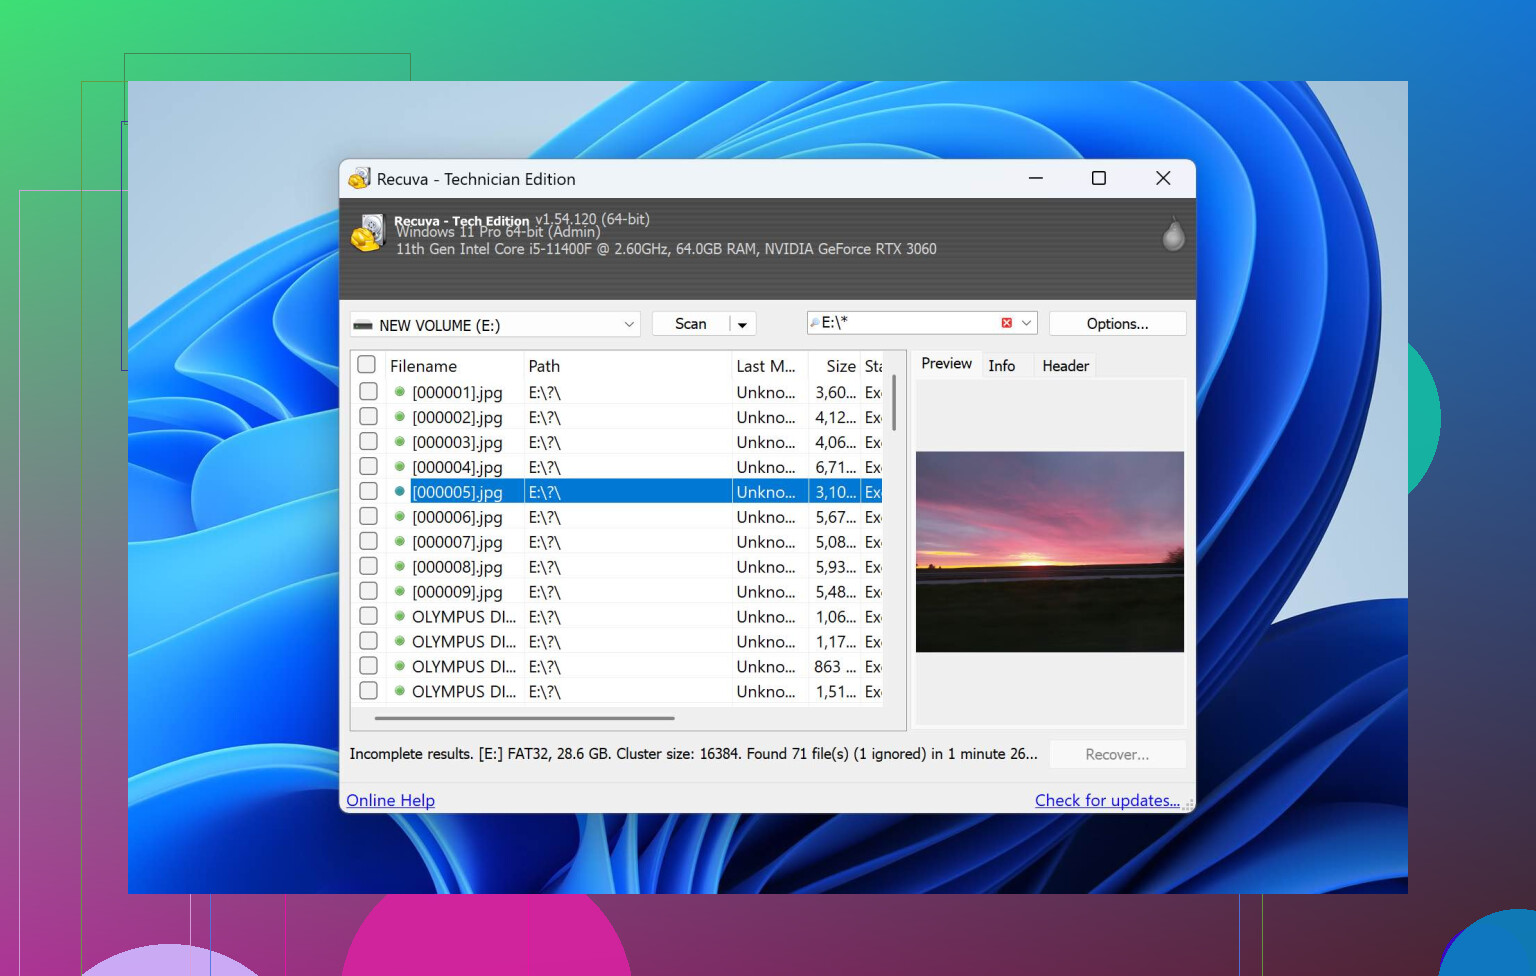
Recuva
- Free
- Simple interface
- Works best for recent, lightly used deletions on healthy drives
- Struggles more with large batches, older deletions, or when the file system got messy
- RAW previews and video recovery are hit or miss, especially on bigger mixed folders
Disk Drill
- Paid for actual recovery above the free limit, but you see previews first
- Handles large mixed sets of files better, especially photos, videos, docs
- Good at reconstructing folder structure on NTFS
- Strong preview support so you see what is intact before paying
- Extra features like byte to byte backup help if the drive starts acting weird
Where I slightly disagree with @mikeappsreviewer is on “always default to Disk Drill without testing”. For a simple “oops I deleted yesterday” on a healthy internal SSD, Recuva can work fine. For important family photos plus work files, and Recycle Bin already cleared, I would not rely only on Recuva.
- Concrete steps I would take in your position
- If you have a second drive, install Disk Drill there, not on the drive with the deleted data.
- Run Disk Drill on the affected drive.
- Let it scan and watch what it finds. Do not restore to the same drive, pick an external or another internal.
- Check previews of the key work files and family photos. If they open correctly, go ahead and recover.
If Disk Drill finds very little or the previews look corrupted, then try Recuva as a second opinion. Use its deep scan, again restoring to another drive. Sometimes one tool picks up files the other missed.
- Quick note on what data recovery is
Data recovery is the process of getting back files that were deleted, lost after a format, or affected by file system damage or drive problems. Software like Disk Drill or Recuva scans the storage device, looks for file system records and raw file patterns, then lets you restore what is still intact. For a clear, SEO friendly explainer on how this works and what to expect from different methods, this guide is solid:
how data recovery works and what you should expect from it.
- My recommendation for you
Given you deleted a large batch of mixed personal and work files, and the Recycle Bin is already emptied, go with Disk Drill as your main tool. Use Recuva only after that if you want to double check. Preview first, pay only if the previews look good, and restore to a separate drive.
Given what you described, I’d lean Disk Drill first, Recuva second, but not for exactly the same reasons @mikeappsreviewer and @techchizkid gave.
Where I agree with them:
- Disk Drill is way better when you have a mixed, large batch of stuff: photos, docs, videos, etc, especially when the Recycle Bin is already emptied.
- Being able to preview before paying is huge. If you see the files and they open in preview, odds are they’ll restore fine.
Where I slightly disagree:
- I would not even install Recuva on the same system drive that just lost a ton of files. Recuva is small, yeah, but it still writes to disk. If the deleted stuff was on C: and you install any recovery tool on C:, you’re literally gambling with overwrite. I’d grab a USB stick or external drive, install whichever tool there, then scan the internal drive.
- Recuva’s deep scan can sometimes dig up a couple of extra odd files Disk Drill misses, but in my experience that happens more with tiny, simple things (single docs, small JPGs), not entire big folders of valuable data like you have.
For your exact situation
- Large batch
- Important work + family files
- Recycle Bin already empty
- Windows PC
I’d do this, in this order:
-
Stop touching that drive
No downloads, no Windows Updates, no “quick cleanups,” nothing. Every write on that partition is a dice roll against your deleted data. -
Install Disk Drill somewhere else
- If the deleted files were on C:, install Disk Drill on D: or an external SSD / HDD.
- In Disk Drill, scan the whole affected partition, not just a folder.
-
Check what Disk Drill actually sees
- Focus on the key stuff: your main work folder, your family photo/video folders.
- Use the preview heavily. If previews look correct for most of what you care about, I’d pay for recovery at that point and pull everything to another drive.
-
Only after that, try Recuva as a “second opinion”
- Same rule: restore to a diff drive.
- Run its deeper scan, but manage expectations. In a complex “big batch wiped” scenario, Recuva is more of a “maybe it finds a few more scraps” tool, not the main event.
One thing that hasn’t been said enough: if those files are literally irreplaceable (like baby pics, old projects that can never be redone), Disk Drill’s option to make a byte‑to‑byte image and then scan that image is worth it. It reduces how many times the original drive gets hammered. That really matters if your drive starts acting even slightly weird while you’re scanning.
If you ever decide Recuva just isn’t cutting it, there are solid modern data recovery tools that go beyond Recuva with deeper scans and better support for photos and videos. But for right now, with what you’ve described, I’d start with Disk Drill, confirm via preview that it can see your stuff, then recover to a clean external drive and only afterward play around with anything else.
Between Disk Drill and Recuva in your exact “big batch, Recycle Bin emptied, mixed personal + work data” situation, I would treat them as different classes of tool, not direct substitutes.
Quick stance:
Use Disk Drill as the primary recovery tool, then optionally use Recuva afterward as a lightweight second pass. Not the other way around.
Where Disk Drill actually fits better than Recuva here
Ignoring what @techchizkid, @espritlibre and @mikeappsreviewer already covered about workflows, here is a more stripped‑down comparison that matters for your case:
Disk Drill:
Pros
- Very strong at “whole volume” disasters with mixed data (docs, photos, videos) after emptying Recycle Bin.
- Unified scan: you do not have to decide quick vs deep in advance, which reduces the chances of you picking the wrong mode under stress.
- Consistently better at complex formats and large media sets, especially RAW photos and camera / drone video.
- Helpful extras for this kind of mistake: byte‑to‑byte disk imaging and session saving so you can retry without re‑hitting the drive.
- Cross‑platform, so if you ever plug this drive into a Mac later, you are not rebuilding your workflow from scratch.
Cons
- It is paid if you actually want to recover, which hurts in a one‑off emergency.
- Interface, while friendly, has enough options that you can still get confused if you click everywhere at once.
- Overkill if you only lost a couple of small office docs and nothing else.
- All‑in‑one approach can tempt people to “try features” on the same damaged drive, which means more reads than strictly necessary.
Recuva:
Pros
- Free for basic recovery, low friction to try.
- Tiny and fast on simple “oops deleted yesterday” cases.
- Good when the loss is small and recent and you know exactly which folder was hit.
Cons
- Weak at modern camera workflows, long videos, and multi‑format, multi‑folder disasters.
- Deep scan is blind carving with a lot of junk, and very basic previews.
- Development has lagged behind the storage world a bit, which starts to show on newer hardware and large SSDs.
Where I half‑disagree with some earlier points: Recuva is not inherently unsafe as long as you install it off the affected volume, and in a very small, recent deletion scenario it can be “good enough.” The moment you say “large batch of important work and family files” though, I would not give it first shot.
How I would sequence tools for your exact scenario
To avoid repeating the already described click‑by‑click steps:
-
Give Disk Drill the first and cleanest look at the drive.
One uninterrupted scan of the affected volume, results saved to a different drive. If it shows healthy previews of the important folders, recover with it and consider that your main attempt. -
Only after that, if you feel something key is missing, run Recuva as a scavenger.
Sometimes Recuva digs up a random doc, PDF or small JPEG Disk Drill did not prioritize. Treat that as bonus, not plan A. -
If Disk Drill’s preview already shows your work projects and family folders intact, do not keep “shopping around” tools on the same drive.
Every extra experiment increases risk, especially on SSDs where background processes and TRIM are constantly reshuffling blocks.
Why I still lean Disk Drill for you, despite the price
You described: big batch, multiple file types, and no Recycle Bin safety net. That is exactly the profile where Disk Drill behaves like a generalist data‑recovery suite and Recuva behaves like a free utility that is starting to feel old.
The others have already gone into real‑world stories and technical details. My additional angle is simply risk management: in a one‑time catastrophe, it is cheaper to pay for the tool that gets most of it back in one good pass than to save money and raise the odds you need a data recovery lab later.
So: Disk Drill first, Recuva second if you are curious, and keep restores targeting a separate physical drive regardless of which you use.