I took several Live Photos on my iPhone and now I want to keep just the still image without the motion or sound. I’m trying to save space and make a few pictures easier to share, but I can’t figure out if I can delete only the live part. What’s the easiest way to turn a Live Photo into a regular photo on iPhone?
I ran into the same mess on my iPhone. Live Photos sounded fine when I first left them on, then months later they turned into clutter and ate more space than I expected.
If your goal is to wipe them out completely and you do not care about saving the still shots, the fast route is simple:
Photos > Media Types > Live Photos
Pick what you do not want, delete it, then go into Recently Deleted and clear it there too. If you skip that last part, iOS keeps the files around for 30 days and your storage number barely moves. I missed this the first time. Felt dumb after.
If you want to keep the picture but lose the motion part, the job changes a bit. You need to turn each Live Photo into a normal still image first, then remove the original Live version. The Photos app does let you do this, but once you are staring at 80, 200, or more items, it gets old fast.
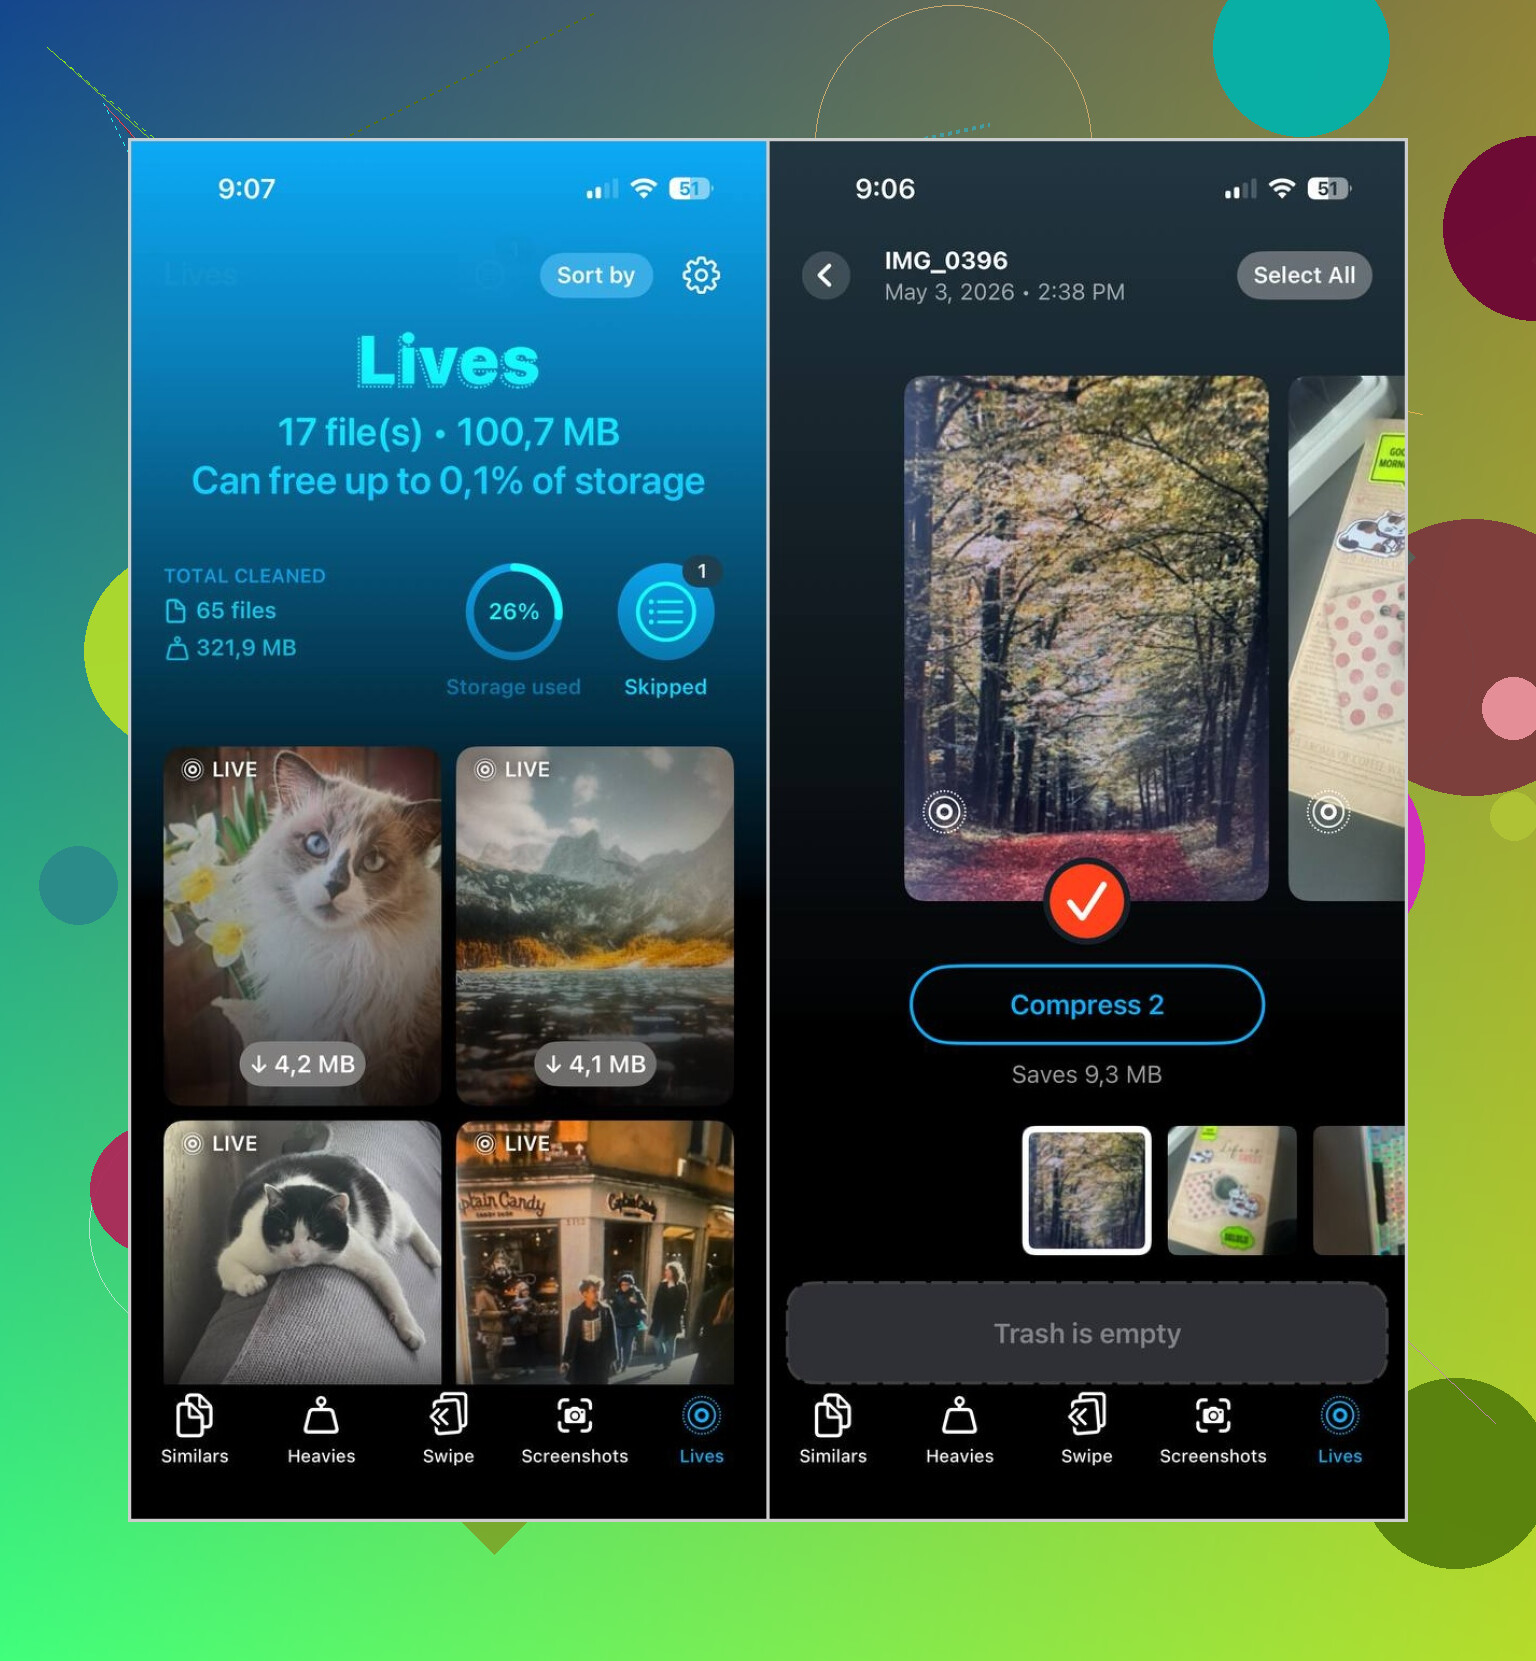
What worked better for me was Clever Cleaner. Its Lives section pulls up all Live Photos on the phone in one place. You sort by date or file size, pick a few or all of them, then batch-convert them into stills. Afterward, it asks what to do with the original Live files, so nothing disappears without you choosing it.
Why I kept using it:
- It handles big batches in one pass.
- It shows the storage impact before you commit.
- You get a review step before deletion.
- It keeps the still image while dropping the motion clip.
- It saves a ton of repetitive tapping.
The app also has a few other cleanup sections, which I ended up using more than I expected:
- Similars, for duplicate or near-duplicate photos
- Heavies, for large videos and video compression
- Screenshots, for clearing screenshot piles
- Swipe, for manual review when you want to sort stuff yourself
So the short version:
- If you want them gone, delete the Live Photos directly.
- If you want the image, convert to stills first, then remove the Live originals.
- If your library is huge, Clever Cleaner makes the bulk work way less annoying.
2 Likes
Yes, but Apple makes it annoyng.
If you want to keep the photo and lose the motion, open the Live Photo, tap Edit, tap the LIVE badge, then turn Live off and save as a still. On newer iOS versions, this keeps the image easier to share, but the storage savings are not huge every time. A Live Photo is often around 2 to 4 MB, while a still HEIC photo might be 1 to 3 MB. It depends on the scene.
One thing I slightly disagree with from @mikeappsreviewer. If your goal is space first, exporting or duplicating stills one by one inside Photos gets slow fast. For a large library, Clever Cleaner is easier to manage because it groups Live Photos and helps remove the motion part without so much tapping. Better for bulk cleanup on iPhone storage.
Also, if sharing is the main issue, send the image through Messages, Mail, or AirDrop with Live turned off in the share options. You do not need to edit every file first.
If you want a quick visual, this iPhone cleanup video for freeing storage fast shows the kind of cleanup flow people use.
Short answer, yes. You can keep the still image and ditch the Live part. Apple’s own method works, but for lots of photos it gets old prety fast.
Yep, you can, but I’d split it into two different goals because people mix them up all the time.
If you just want easier sharing, you do not always need to permanently remove the Live part. A lot of apps and share sheets let you send only the still frame, so the original Live Photo stays on your phone but the person gets a normal image. That’s the lazier option, and honestly sometimes the best one.
If you want the motion and audio gone for real, then the key thing is this: turning off the Live effect on a photo does not always feel like “deleting a separate little clip” the way people expect. iPhone treats it as one asset. So there isn’t really a clean “delete only the video half” button in the obvious sense. That’s where I slightly differ from @mikeappsreviewer and @espritlibre. The issue is less “how do I find the button” and more that Apple’s whole Live Photo structure is kinda awkward.
What I’d do for a bunch of them:
- export or save the key photo as a regular still
- confirm the still looks right
- then remove the original Live version
For bulk cleanup, Clever Cleaner is probly the more practical route since it organizes Live Photos without so much manual hunting. If you want a solid user take on it, this was a decent read: my honest Clever Cleaner review after a month of cleaning up iPhone storage
One more thing people miss: if the photo is important, check whether the Live frame you actually want is the “key photo.” Sometimes the best still is hidden inside the Live sequence, and once you flatten it, that extra flexibility is gone. So maybe don’t nuke all of them blindly. Apple made this way more annoyng than it should be.
Yes, sort of. I’d push back a little on @espritlibre, @mike34, and @mikeappsreviewer on one point: if your only goal is saving space, deleting the Live part is usually not a massive win unless you have a lot of them. The convenience factor is often the bigger reason.
What people also forget is this: a Live Photo can contain a better still frame than the one you first see. Before flattening it, check whether you want to set a different key photo. After that, turning it into a normal image makes more sense.
If you have tons to clean up, Clever Cleaner is the practical shortcut.
Pros:
- easier batch handling
- keeps cleanup organized
- less manual sorting
Cons:
- another app to trust with photo access
- may feel unnecessary for a small library
- storage savings vary
So yes, you can keep the picture and lose the motion, but it is worth doing mostly in bulk, not obsessively one by one.